Spring Cleaning: Tips By Room


Time For A Massive Cleaning Spree!
Spring Cleaning doesn't have to be in the spring. Anytime is a good time to go through the house and make it glisten in the sun. Grab your supplies, set aside a time frame and buckle down.
I know cleaning is not something that many of us enjoy. But it does have to get done. Here is some tips to make the job easier (on your mind at least).
Before you begin...
Things to keep in mind.
When you are doing an overhaul cleaning, no matter how big or small the house, there are a few things you need to remember to make the job easier.
1. Make a checklist. Include everything that needs to be done, even if it is something that will happen as you work. Check things off as you do them to save time from repeating the same chore because you forgot if you did it. This will also help you remember what still needs to be done that you may have forgotten.
2. Do one room at a time. Running from room to room will just get you confused and can lead to more messes than you may have had in the first place.
3. Start high and work down. It is kind of pointless to vacuum before dusting the ceiling fan.
4. Start in one area and work out. If you jump from one place to another, you are more likely to miss something.
5. Just because it appears fine at first glance doesn't mean it doesn't need cleaning. Alot of times if you just go over the item one time, you will notice a huge difference or may notice something else that you may have missed otherwise.
6. Take your time. When you rush to try to get it done and over with, you forget or miss things.
7. Set time limits. You don't want to do too much at one time, you will wear yourself out before you can finish. After an hour of cleaning, take the next 30 mins to eat something or power-nap or watch a tv show or check on your lenses.
8. Don't procrastinate. When you take those 30 mins to yourself, don't forget to get back to work. Keep yourself motivated and use some of the time to plan your next area of attack. Use an egg timer to help you get back in action.
9. Before you trash something, think. Sometimes what may be trash to you now may turn out to be something you need or can use for another purpose. If it isn't broken, sometimes you might even know someone who could use or may want it. Or donate it. You were going to just trash it anyways.
10. Don't forget the little rooms like closets or utility/laundry rooms. Even if the rest of the house is clean, these dirty little rooms can affect them. Smells from stinky shoes that should have been tossed or maybe a source to the weak water pressure (leaky pipes) can be found.

The Room for Living....er... The Living Room
The most veiwed room.
The Living Room is probably the largest room in the house. It is also the room that sees the greatest amount of traffic.
It is also usually the easiest room to clean. This makes it so much easier to tackle the finer points. This should be the first room and last room to hit.
Having the Living Room as the first place will make it nice incase you have unexpected guests during your cleaning spree. It also helps you clear up some room that you can use while cleaning the rest of the house.
1. Do ceiling fans and the upper trim first. These are usually forgotten in daily cleaning and tend to get extremely dusty or cobwebbed.
2. If you have stucco or rigged ceilings, spray a paint roller with a dusting product like Endust and roll it across the ceiling. The ceiling usually isn't too bad and just needs dusting. The stucco makes it difficult. The roller makes it easier.
3. Remove all decorations and clean the walls. Start with one wall so you can pull everything away from it and clean behind the couch or tv. Before putting anything back on the wall, remember to clean it. No point in putting a dusty painting on a clean wall. Work around the room.
4. Take down blinds and or curtains. Clean windows and doors and their frames. Doors and frames are usually forgotten. Clean the blinds before putting them back up, wash the curtains. Same applies for any window or door decorations.
5. Clean the bigger furnature. Make sure to clean anything you have on those too. Blankets and throw pillows on the couch, Pictures and nicknacks on the TV or bookshelf.
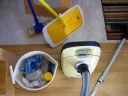
6. Sweep, mop and/or vacuum. This will collect all the dust and dirt that has fallen from everything else you have cleaned. Make sure to get under the couch, chairs, TV and anything else that normally doesn't get moved.
We are now done in the Living Room... for now. We will be back in here for more later.


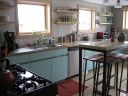
The Heart of the Castle, Your Kitchen
Cooking destruction
This is the room that is the most utilized. It can also be one of the dirtiest. With grease splattering and flour puffing out of bowls or pop spilling and crumbs getting everywhere imaginable, this room seems to never get cleaned.
During a heavy duty cleaning, it might be a wise idea to grill dinner on the bar-b-que or eat out at a resturaunt. It can be heart-wrenching to realize that all the extensive work will never end if you have to keep redoing the kitchen.
1. Always start at the top. Lighing fixtures and ceiling fans and don't forget thetop trim needs to be dusted too. If you can, take the lighting fixture apart so you can get the inside and let the light shine through.
2. Next place to hit up would be on top of the cabinets if they don't stretch to the ceiling. People tend to use this area to decorate and sometimes store extra foodstuffs that don't get used often. Make sure to clean everything before replacing on this "shelf".
3. While we are standing on chairs reaching into places we didn't know existed, we might as well get the next level down, the top of the refridgerator. If this is where you keep you microwave, pull it down and clean it real nicely (if not then you can wait for the microwave a little longer.)
4. Cabinets, cabinets and more cabinets. Clear EVERYTHING out of ever cabinet (use the living room area for this if you don't have much room in the kitchen.) Clean off the shelves that will likely have spilt flour and juice from an unknown container that wasn't cleaned before. Also clean the doors and frames. Plan how you want everything to go back up. Organize your stock and check all dates before returning to the shelves. If something is expired, toss it.
5.Now for the countertop and sink. This is also when you want to start on the walls. Take a butter knife or other flat stiff item around the trim of the sink. Wipe up the stove top too. If you have a spill-over on your stove, lift up the top and get down in there. This tends to get a thick build up and is a fire hazard if left too long.
6. Pull the stove out and clean the sides. Grease tends to run down in this area and poses a fire hazard. It is also an attractant to insects. While you have the stove pulled out, give the walls and floor a good cleaning.
7. Open the fridge and freezer and scream for a moment. Ok now start taking everything out. This part needs to be done rather quickly so nothing gets spoiled or defrosted. Take out each individual shelf and wash it off completely. Don't forget the shelves in the door. They tend to cake over with ketchup and other condiments. Organize and replace things that are not expired or growing fuzz.
8. Now for the lower cabinets (if not tackled already) and fronts of appliances. This tends to be easier than it looks really.
9. Pull out the fridge and any shelfing systems you have and get the wall and floor behind them.
10. Sweep and mop.

Not-So-Porta-Potty. The Bathroom
It needs to be done too.
Everyone travels to this room at least once in the day. The room we use to get clean, and yet the room we fear most to clean.
1. Take a deep breath and hold it. Just kidding (maybe). Start with the ceiling and anything that is attached to it (light fixture, venting).
2. If this is where your linin closet is, do that next. No point in cleaning all the bathroom and then pouring all the "beauty products" on the clean floor.
3. Next do the walls and door. This is usually pretty easy and straight forward.
4. Shower/bathtub would be next. Start at the head and then get all the tiling. Then do the faucet and finally the tub. Remember to run a snake through the drain to clear it of any cloggings.
5. Now for the sink and mirror and any cabinetry you may have accompanying it. Take all the meds and other items you keep in this area and make sure they are all still good. Windex the mirror and clean off the counters. Make sure to get into the small areas around the faucet too.
6. Next is the one item in the entire house that you are most afraid to clean but is used the most often (specially in bigger families.) The Throne! The best way to tackle this bad boy is from top down (surprised?). Do the water tank first making sure to get good around the flusher and down the sides and back. Next work on the seat, make sure to do all layers. The top of the lid, under the lid, the top of the seat, under the seat (ewww), and the actual toilet mouth. Don't forget to get that area between the seat and the tank. It tends to get real bad there if you don't watch it. Then do the bowl inside and then outside. Finish up with the base making sure to get all the way around to the back.
7. Now for the floor. Sweep and mop. You can breath again now.

Domain for the Masters. Master Bedroom
The place for peace, solitude, and a little bit of fun.
It is my room and no one ever sees it but me! But what is better than wanting to get away and being able to walk into your room and make it to your bed without fear of being eatten by the monster that is sure to exist from the dirty laundry all over the floor.
1. Ceiling and light fixtures and upper trim. (Ok I know you got the point on that but if I don't say it, someone out there will be saying something about forgetting about the lights!)
2. Take all the nice niknaks off the walls and clean them and the walls.
3. This room has different setups from house to house so everything else will be in which ever order you have that makes it from top down.
4. Shelves and closet space. Take all your clothes off the hangers and go through them. Donate or hand-me-down anything that doesn't fit or you have no intention on wearing ever again.
5. Dresser and vanity areas. Organize the top of the dresser and clean it up nicely. Go through the clothes in the dresser as you did in the closet. While the dresser is empty, move it and clean the wall and floor behind it.
6. Time for bed. Well cleaning the area on, around and under it anyways. There is a thousand years worth of stuff stored under the bed. You never know what treasures you may have in store. Make sure all the bed linins get washed too.
7. Floors now get to be vacuumed or swept and mopped.

The Kiddie Kingdom. Children's Bedroom
Or the Little Room of Horrors
Let the kids do most of this as it is their room. But there are things for you to do in here.
1. Light Fixtures and upper trim.
2. Dusting areas that the kids can't reach.
3. Go through the toybox and discard any toys that are broken or missing too many pieces. Have the kids go through the rest of the toys and deside which ones they want to keep and which ones they feel to old for. Donate or hand-me-down.
4. Vacuum or sweep and mop.
Living Room Part 2
Putting the Finishing Touches on Your Hard Work
The only thing you need to do in here really is re vacuum the floor. If there are other things that found their way into the living room and not back to their proper location, now would be the time to find their place.
Congratulations on obtaining a nice clean house.
I am now sitting in the corner enjoying my work.